From inside (document excerpt):
Form No. 102369 Operating Instructions for: 014-00133 60299 1807 Floor Crane Assembly Max. Capacity: 1000 lbs. Check the contents of the shipping carton against the parts list to be sure all parts are present before beginning assembly. Safety Precautions · Caution: To prevent personal injury and/or equipment damage, Read and carefully follow the safety precautions and operating instructions for this floor crane, and the pump and ram used with this floor crane.
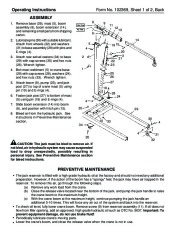
Most problems with new equipment are caused by incorrect operation or assembly. Wear eye protection that meets the requirements of ANSI Z87.1 and OSHA. Never attempt to lift a load heavier than the rated capacity of the crane boom, because overloaded equipment can fail. Stay out from underneath a load being lifted or suspended. To prevent tipping: do not lift or move a load that has a center of gravity extending beyond the legs or wheels; do not move a loaded crane unless the load has been lowered as close to the floor as possible; use extreme caution when moving a loaded crane on an incline or around a corner, because the load can swing out beyond the wheels and cause the crane to tip over. Do not modify this floor crane. If a modification is needed, contact OTC Technical Services. The owner of the crane is responsible for ensuring that procedures are followed according to federal, state, and local safety regulations. Sheet No. SPX Corporation 1 of 1 Rev. 11-10-99 Issue Date: Operating Instructions ASSEMBLY 1. Remove base (29), mast (5), boom assembly (8), boom extension (14), and remaining small parts from shipping carton. 2. Lubricate pins (30) with suitable lubricant. Attach front wheels (32) and washers (31) to base assembly (29) with pins and E-rings (4). 3. Attach rear swivel casters (34) to base (29) with cap screws (35) and hex nuts (26). Wrench tighten. 4. Bolt mast weldment (5) to crane base (29) with cap screws (28), washers (24), and hex nuts (33). Wrench tighten. 5. Attach boom (8), pump (23), and jack post (27) to top of crane mast (5) using pin (19) and E-rings (4). 6. Fasten jack post (27) to bottom of mast (5) using pin (19) and E-rings (4). 7. Slide boom extension (14) into boom (8), and position with hitch pin (15). 8. Bleed air from the hydraulic jack. See instructions in Preventive Maintenance section. 34 35 4 4 2 8 Lbs Cap. Kg Cap. Form No. 102369, Sheet 1 of 2, Back The jack must be bled to remove air. If not bled, air in hydraulic system may cause suspended load to drop unexpectedly, possibly resulting in personal injury. See Preventive Maintenance section for bleed instructions. 32 31 PREVENTIVE MAINTENANCE · The jack reservoir is filled with a high grade hydraulic oil at the factory and should not need any additional preparation. However, if the action of the boom has a “spongy ” feel, the jack may have air trapped in the reservoir. To remove this air, go through the following steps. (a) Remove any work load from the crane. (b) Close the release valve located near the bottom of the jack, and pump the jack handle to raise the crane boom to the maximum height. (c) With the crane boom at the maximum height, continue pumping the jack handle an additional 5-10 times. This will force any air out of the system and back into the reservoir. To check oil level, fully lower crane boom. Remove screw (9) from reservoir assembly (11). If oil does not flow from filler opening, add an approved, high grade hydraulic oil such as OTC No. 9037. Important: To prevent equipment damage, do not use brake fluid! Periodically lubricate crane’s moving parts. Lower the crane’s boom, and close the release valve when the crane is not in use.


 SPX OTC 014 00133 1807 60299 Floor Crane Assembly Max Capacity 1000 Lbs Owners Manual - 1 of 2
 SPX OTC 014 00133 1807 60299 Floor Crane Assembly Max Capacity 1000 Lbs Owners Manual - 2 of 2