From inside (document excerpt):
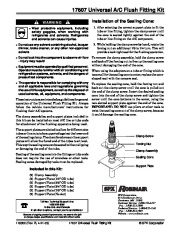
17607 Universal A/C Flush Fitting Kit WARNING Installation of the Sealing Cone: 1. After selecting the correct support plate to fit the tube or line fitting, tighten the clamp screw until the cone is seated tightly against the end of the tube or line fitting on the A/C component. 2. While holding the clamp screw by hand, rotate the forcing nut an additional 1/8 to 1/4 turn. This will provide a leak-tight seal for the flushing operation.
Heating, Ventilating and Air Conditioning User Manual Free Download. HAVC Operator’s Manual. Auto AC Free Instruction Manual Download PDF.
To remove the clamp assembly, hold the clamp screw and back off the forcing nut to free up the sealing cone without damaging the end of the cone. When using the adapters on a tube or fitting which is too small for the sealing cone to enter, replace the coneshaped seal with the concave seal. To replace the sealing cone, hold the forcing nut and back out the clamp screw until the cone is pulled out the end of the clamp screw. Insert the desired sealing cone into the end of the clamp screw and tighten the screw until the cone bottoms in the screw, using the non-slotted support plate against the end of the cone. IMPORTANT: DO NOT use pliers or other tools to twist the sealing cone out of the clamp screw, because it could damage the sealing cone. · Wear protective equipment, including safety goggles, when working with refrigerants and solvents. Refrigerants and solvents can cause injuries. · Do not use any solvent containing alcohol, lacquer thinner, brake cleaner, or any other non-approved solvent. · Do not look into the component to observe air flow – injury may result! · Equipment must be operated by qualified personnel. Operator must be familiar with air conditioning and refrigeration systems, solvents, and the dangers of pressurized components.


 Robinair SPX 17607 Universal AC Flush Fitting Kit Owners Manual - Enlarge page 1